

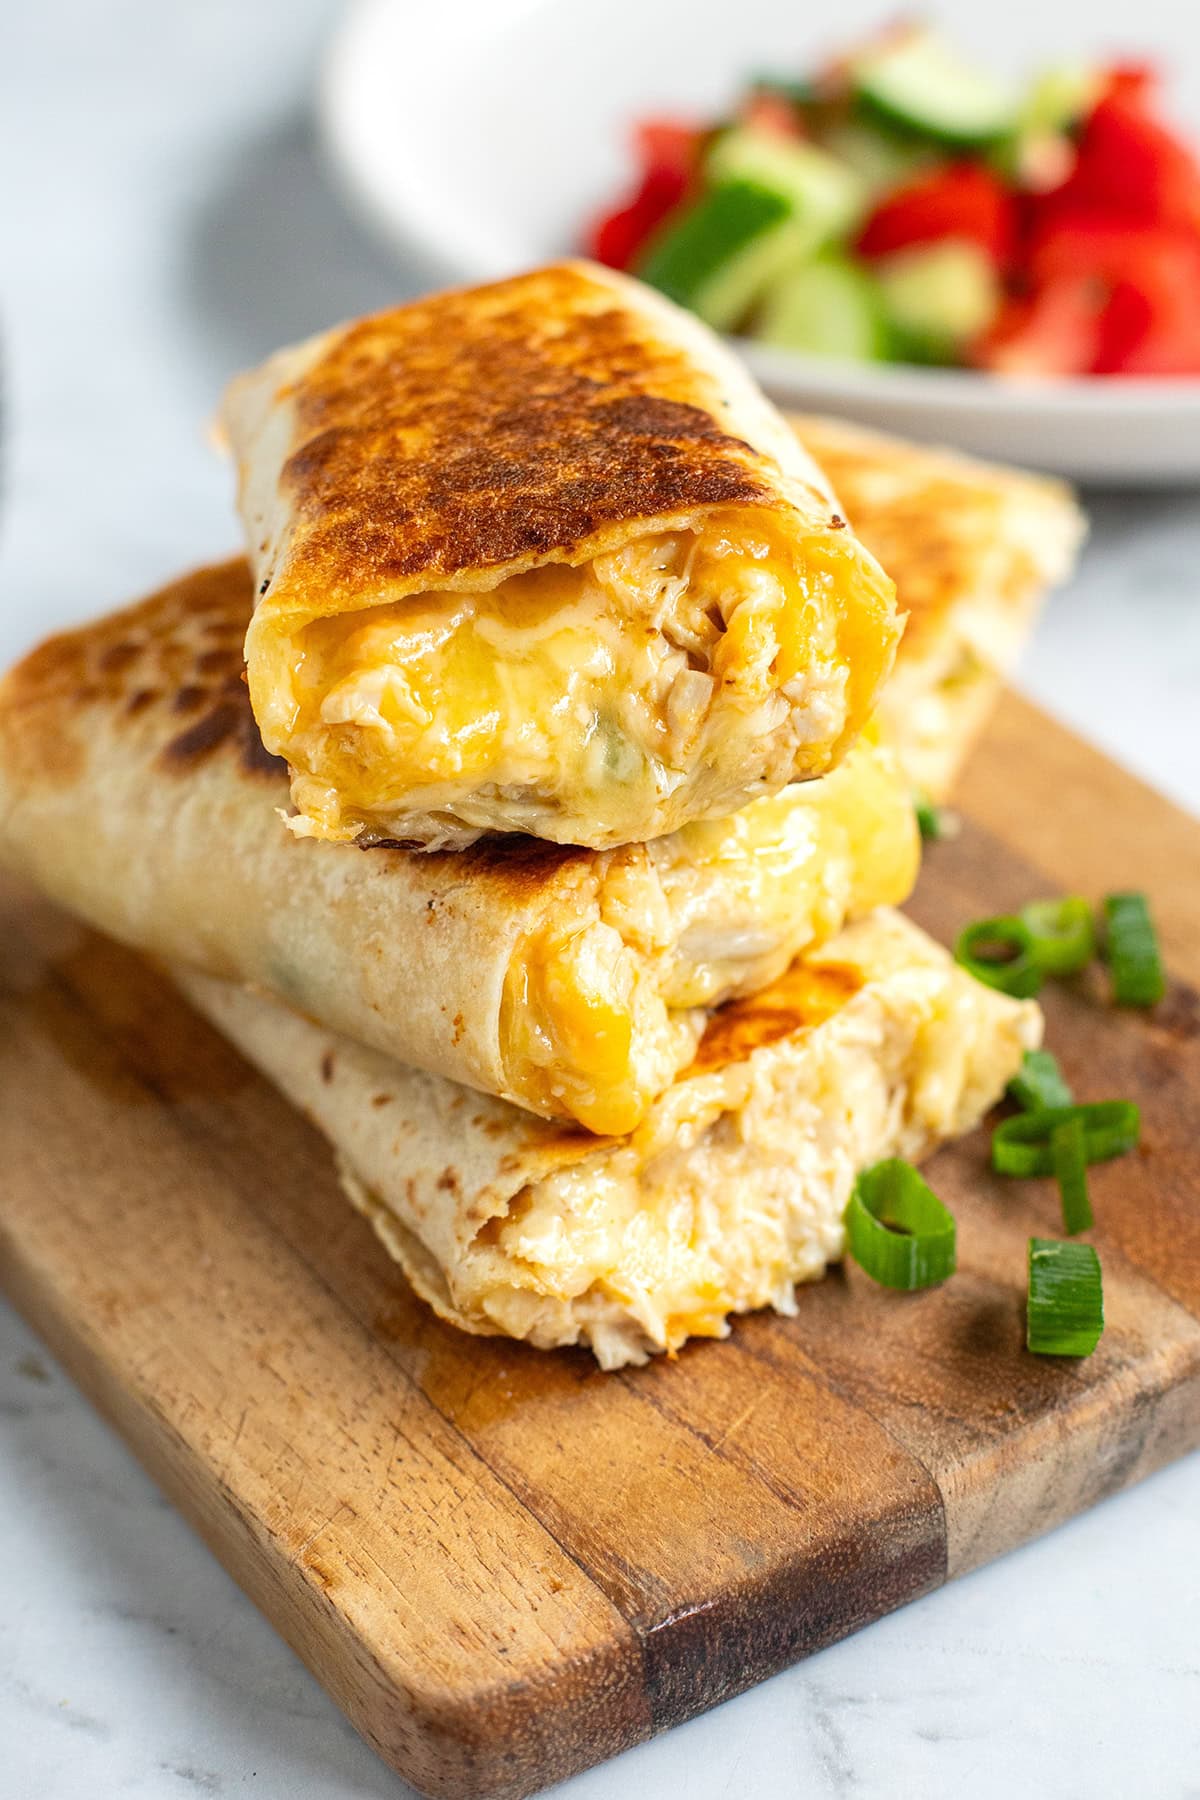
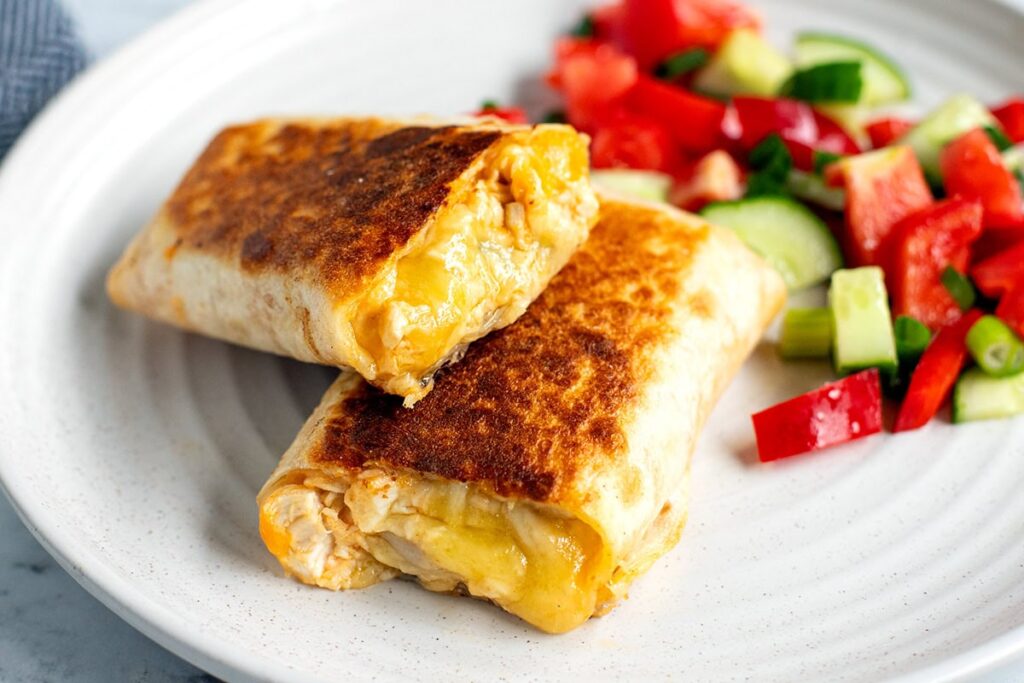
Cheesy garlic chicken wraps — crispy on the outside, gooey and garlicky inside, and honestly just the kind of easy comfort food I keep coming back to. Bonus, it’s high-protein and satisfying, great for lunch or dinner.

The contrast of the crispy, golden wrap and that gooey, cheesy filling is so good in every bite. The garlic is fresh and punchy (but feel free to adjust amounts), and you can totally prep the chicken mix ahead. It works with regular tortillas or low-carb wraps, and it pan-fries like a dream. I made two wraps and still had leftover filling—which made the best grilled cheese sandwich the next day. Flexible, freezer-friendly-ish, and just really good.
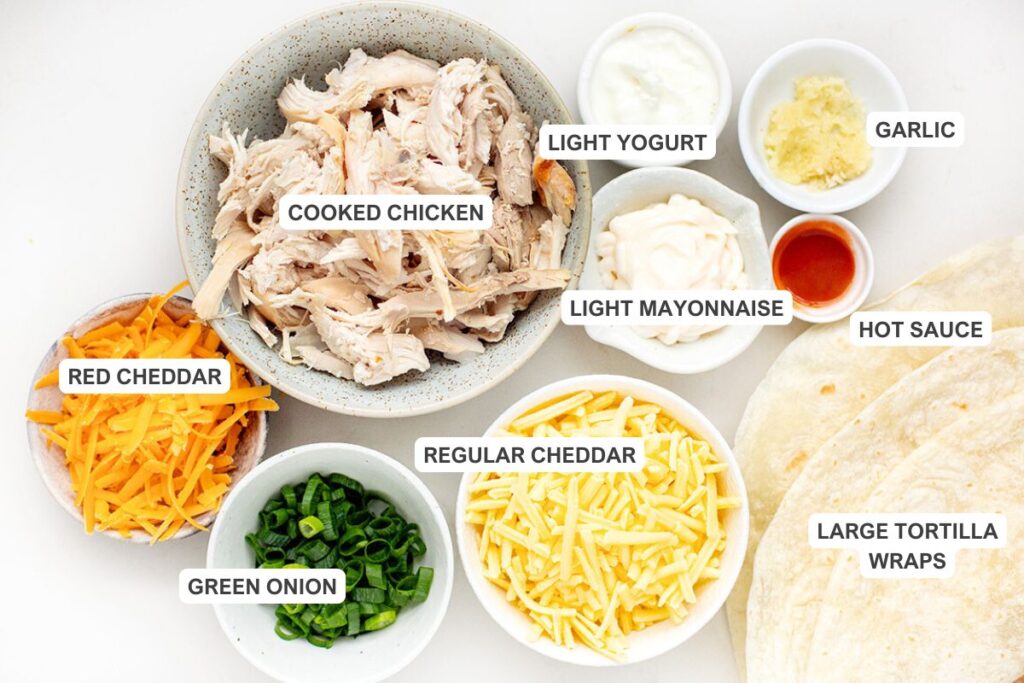
What You’ll Need
Here is what you’ll need for these cheesy garlic chicken wraps recipe. Find the full measurements in the recipe card below.
- Tortillas – Use large wheat wraps or low-carb, high-protein ones.
- Cooked chicken – Rotisserie chicken works like a charm, or use leftovers.
- Garlic – Fresh and grated for that bold flavor hit.
- Mayo + Greek yogurt – Creamy and a little tangy; I use light for both to reduce those sneaky calories.
- Hot sauce – A touch of heat and zing (Frank’s Hot Sauce is my go-to).
- Salt – Just a pinch to round everything out.
- Shredded cheese – Cheddar or a mix (I used regular and red cheddar). Melty is key.
- Green onion – Adds a fresh, sharp crunch. You can use chives or even chopped red onion here.
- Olive oil spray – For that crispy, golden finish.
- Avocado, sun-dried tomatoes, olives, gherkins, a little spinach, mushrooms — go wild. This recipe’s a great base.
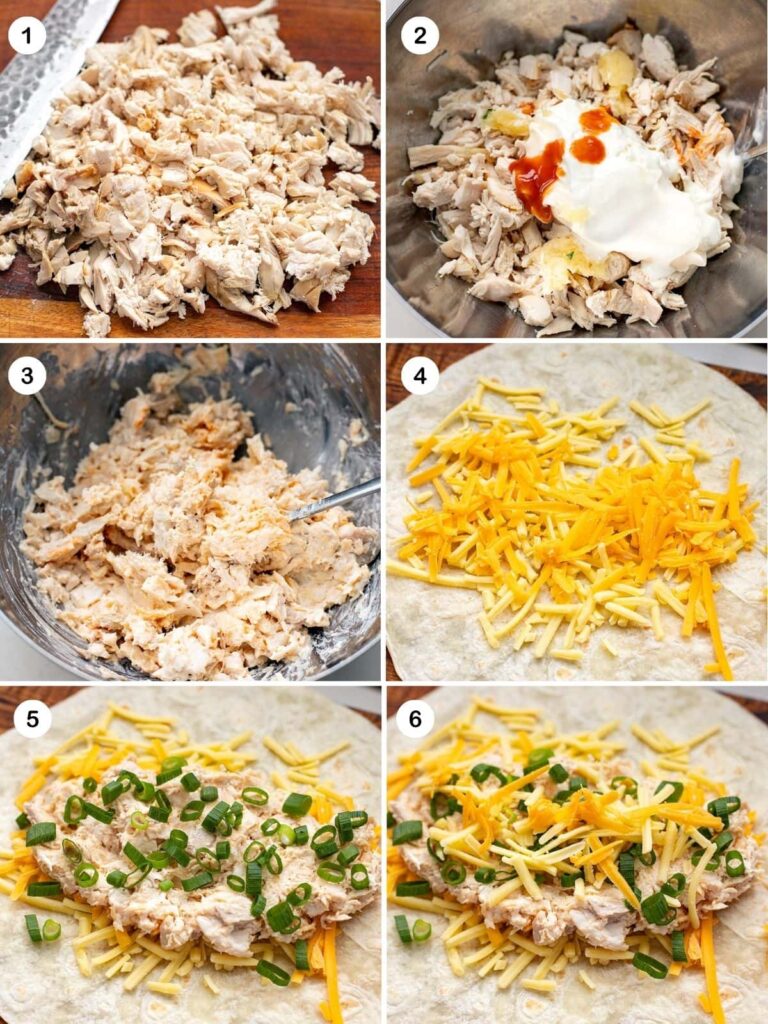
How To Make Cheesy Garlic Chicken Wraps
Find the full recipe and nutritional information below. Here are some handy step-by-step photos for cheesy garlic chicken wraps.
- Mix chicken, garlic, mayo, yogurt, hot sauce, and salt.
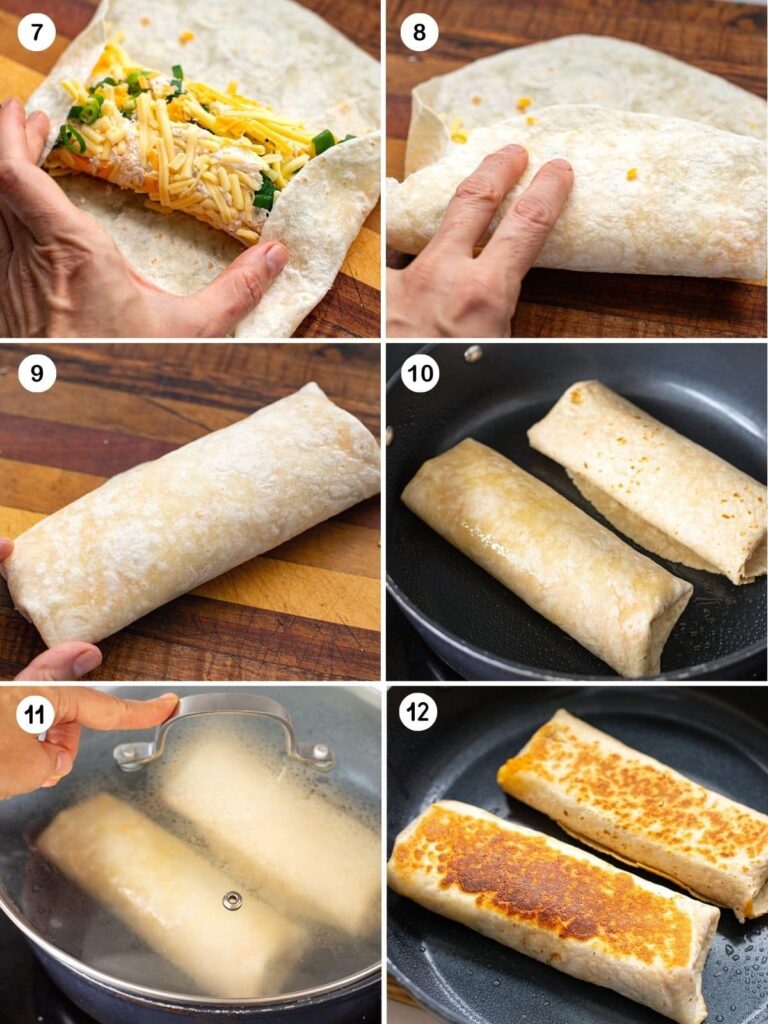
- Fill the wraps: cheese → chicken mix → more cheese → green onion.
- Roll them up tightly.
- Pan-fry in a bit of oil until golden and crispy (3–4 mins per side). Lid on to help heat through.
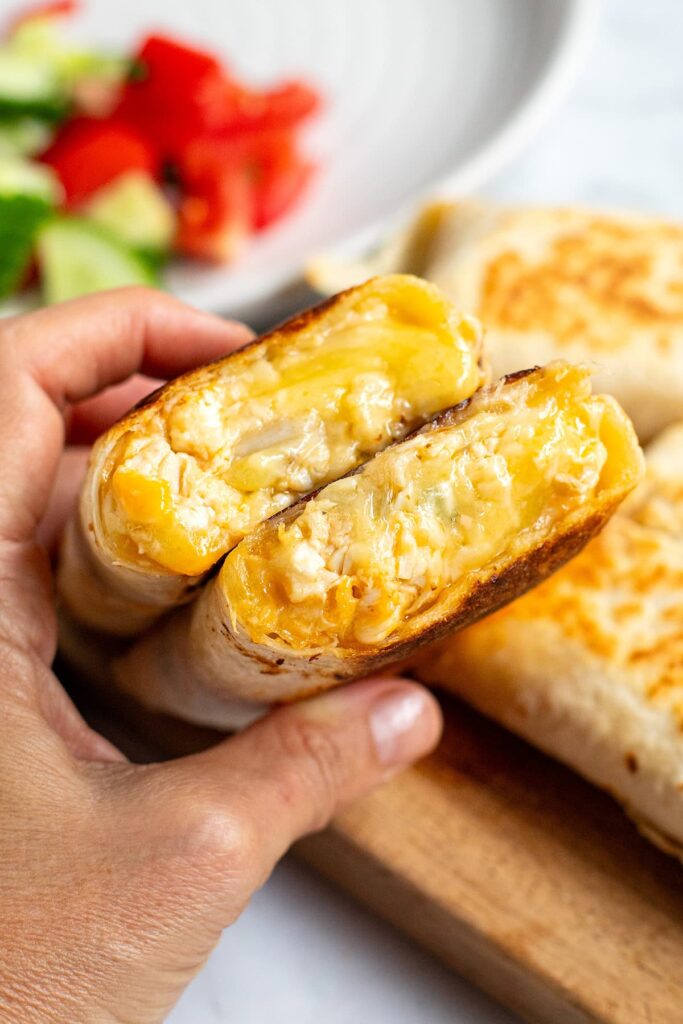
- Slice in half and serve hot.
Recipe Tips
- Covering the pan helps melt the cheese and warm the filling faster.
- Make the chicken filling ahead and keep in the fridge for up to 3 days.
- For a lighter version, reduce the cheese (but honestly, that melty middle is magic).
- Air fryer works too — 375°F (190°C) for about 6–8 mins.
- Use up leftover filling in toasties, quesadillas, or even stuffed into baked potatoes.
- Storage tips: Store cooked wraps in the fridge for up to 2 days. Reheat in a skillet or air fryer to bring back that crisp. I wouldn’t freeze the wrapped version, but the filling can be frozen for up to 1 month.
- Make-ahead tips: You can make the chicken filling 2–3 days ahead and keep it chilled. Just wrap and cook when ready to eat.

Cheesy Garlic Chicken Wraps
Ingredients
- 2 large tortillas regular or low-carb/high-protein
- 7 oz cooked chicken about 200 grams, chopped (rotisserie is great)
- 2 garlic cloves minced or grated (adjust to taste)
- 2 tablespoons light mayonnaise
- 1 tablespoon light Greek yogurt or plain yogurt
- 2 teaspoons hot sauce like Frank’s
- ¼ teaspoon salt
- 3 oz grated cheese about 90 grams (I used a cheddar blend)
- ▢1 green onion chopped
- Olive oil spray
Instructions
- In a bowl, mix chopped chicken, garlic, mayonnaise, yogurt, hot sauce, and salt.
- Lay out your wrap. On the lower third of the tortilla, sprinkle about 2 tablespoons of cheese, then top with about ⅔ cup of the chicken mixture. Add another tablespoon of cheese and a sprinkle of green onion.
- Fold in the sides of the tortilla, then roll it up tightly from the bottom.
- Heat a non-stick pan over medium-high. Spray with olive oil.
- Place wraps seam-side down. Cook for 3–4 minutes per side until crispy and golden. Cover with a lid to help heat the inside.
- Slice in half and serve!
Notes
-
- Covering the pan helps melt the cheese and warm the filling faster.
- Make the chicken filling ahead and keep in the fridge for up to 3 days.
- For a lighter version, reduce the cheese (but honestly, that melty middle is magic).
- Air fryer works too — 375°F (190°C) for about 6–8 mins. Can I bake these instead of pan-frying? Yes, bake at 400°F (200°C) for 10–12 minutes, flipping once. But they’re crispier in a pan or air fryer.
- Use up leftover filling in toasties, quesadillas, or even stuffed into baked potatoes.
- Storage tips: Store cooked wraps in the fridge for up to 2 days. Reheat in a skillet or air fryer to bring back that crisp. I wouldn’t freeze the wrapped version, but the filling can be frozen for up to 1 month.
- Make-ahead tips: You can make the chicken filling 2–3 days ahead and keep it chilled. Just wrap and cook when ready to eat.
- Serving suggestions: These wraps are a full meal on their own, but I like to serve them with a big, crunchy salad or some roasted veggies. They’re also great with pickles or a side of salsa for dipping. Bonus points for chips on the side if we’re keeping it real.